

Room EQ Wizard tutorial presented by GIK Acoustics. In this video we take you through downloading, installing, and using Room EQ Wizard. You will learn how to set up your microphone and calibrate your soundcard, as well as how to take a room test measurement.
You will also learn how to set up the limits and viewing ranges for the frequency response graphs and we show you how to generate a waterfall graph. Octave smoothing and overlays are shown as well.
To download Room EQ Wizard, go to hometheatershack.com/roomeq then register on the Home Theater Shack forum if you haven't already. Once you have downloaded and installed, we can launch the program. For testing purposes, you'll need an omni-directional microphone with a flat frequency response. Then calibrate the soundcard and save the file. Finally, you'll set the microphone levels for testing.
Now you are ready for room testing using Room EQ Wizard.
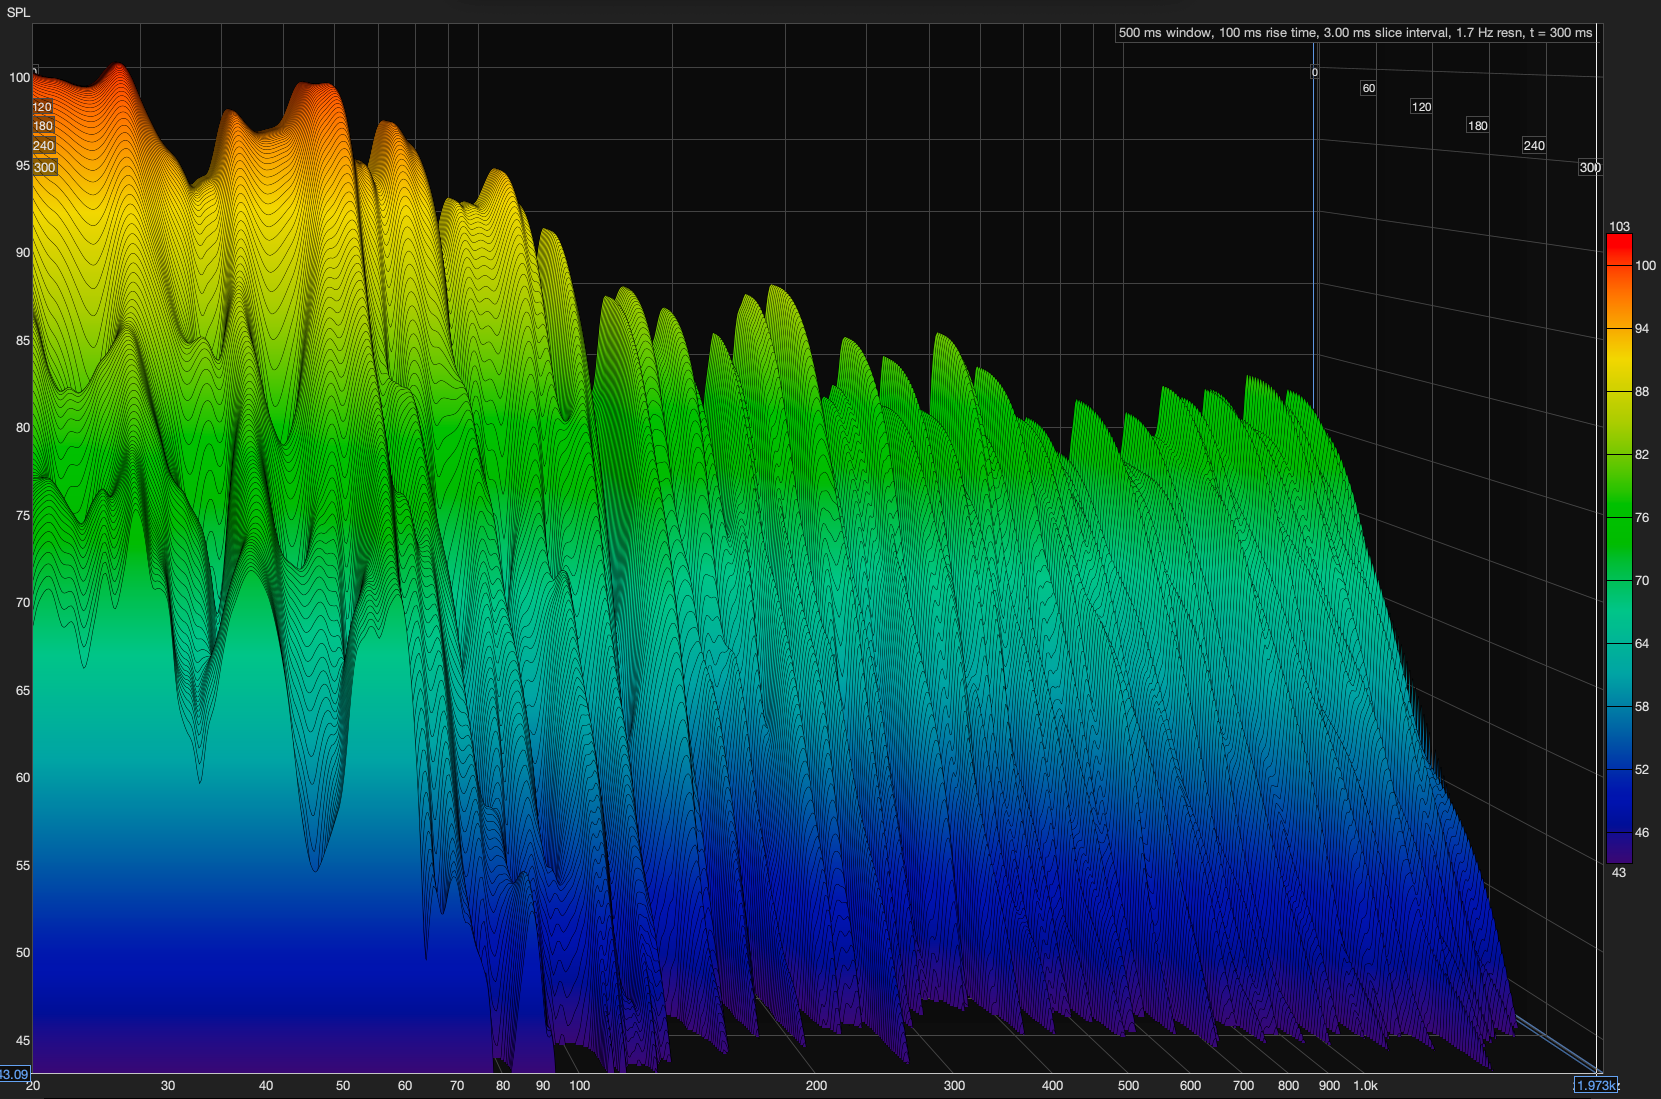
When you're ready, click Start Measuring. (You may want ear plugs.) The sine wave will sweep throughout your selected sweep range. A graph will appear and you can customize the viewing area to accurately see what's going on in the room. You can also generate waterfall graphs to study the decay time.
Talk to one of our acoustic experts — it's free.


Share:
Adding Diffusion to Your Recordings
How Diffusion Works