

It's true that most room design guidelines on the Internet – including those at GIK – are geared more toward listening rooms, home theaters, control rooms, or one-room studios than traditional "live rooms" or rooms in which live music performances are to be recorded. The main principles of treating a recording room, however, are not much different in their theory, only in their application. Let's take a look at some of the main room treatment problems, see how they apply to recording rooms rather than listening rooms, and explore how acoustic treatment solutions can be employed to solve them.
What’s The Goal?
For most of us, the goal is to create a great-sounding, versatile room in which we can record a wide variety of instruments and performers. This versatility will best serve most people who do recording regularly for a wide variety of instruments or clients. Others may want slight variations on this theme – for instance, if you are a drummer who specializes in classic rock, then you might want much more ambiance in your space than a vocalist who needs a drier recording space.
So unless you are building a specialist room, it’s best to keep things as versatile as possible. In the household-sized rooms most of us are working in these days, creating a room with a lively reverb is probably not in the cards, unless you have a tall ceiling to work with. We don’t have to completely deaden the room with a lot of absorption, but we do want to create a workable space to make superior recordings.
Have some movable panels on hand!

As I’ve written before, having some movable panels in a recording room is incredibly useful, and for the purposes of this article I consider it step zero. Even if your “panels” are packing blankets draped across mic stands, you can begin to affect the room’s sound. Having a number of real acoustic panels on hand also opens up a wider variety of microphone techniques, as I explored in this article and video:
But if you are in a longterm recording space, adding more panels installed into the room can elevate your recording space to professional levels. Let's look at the key strategies.
The Sweet Spot

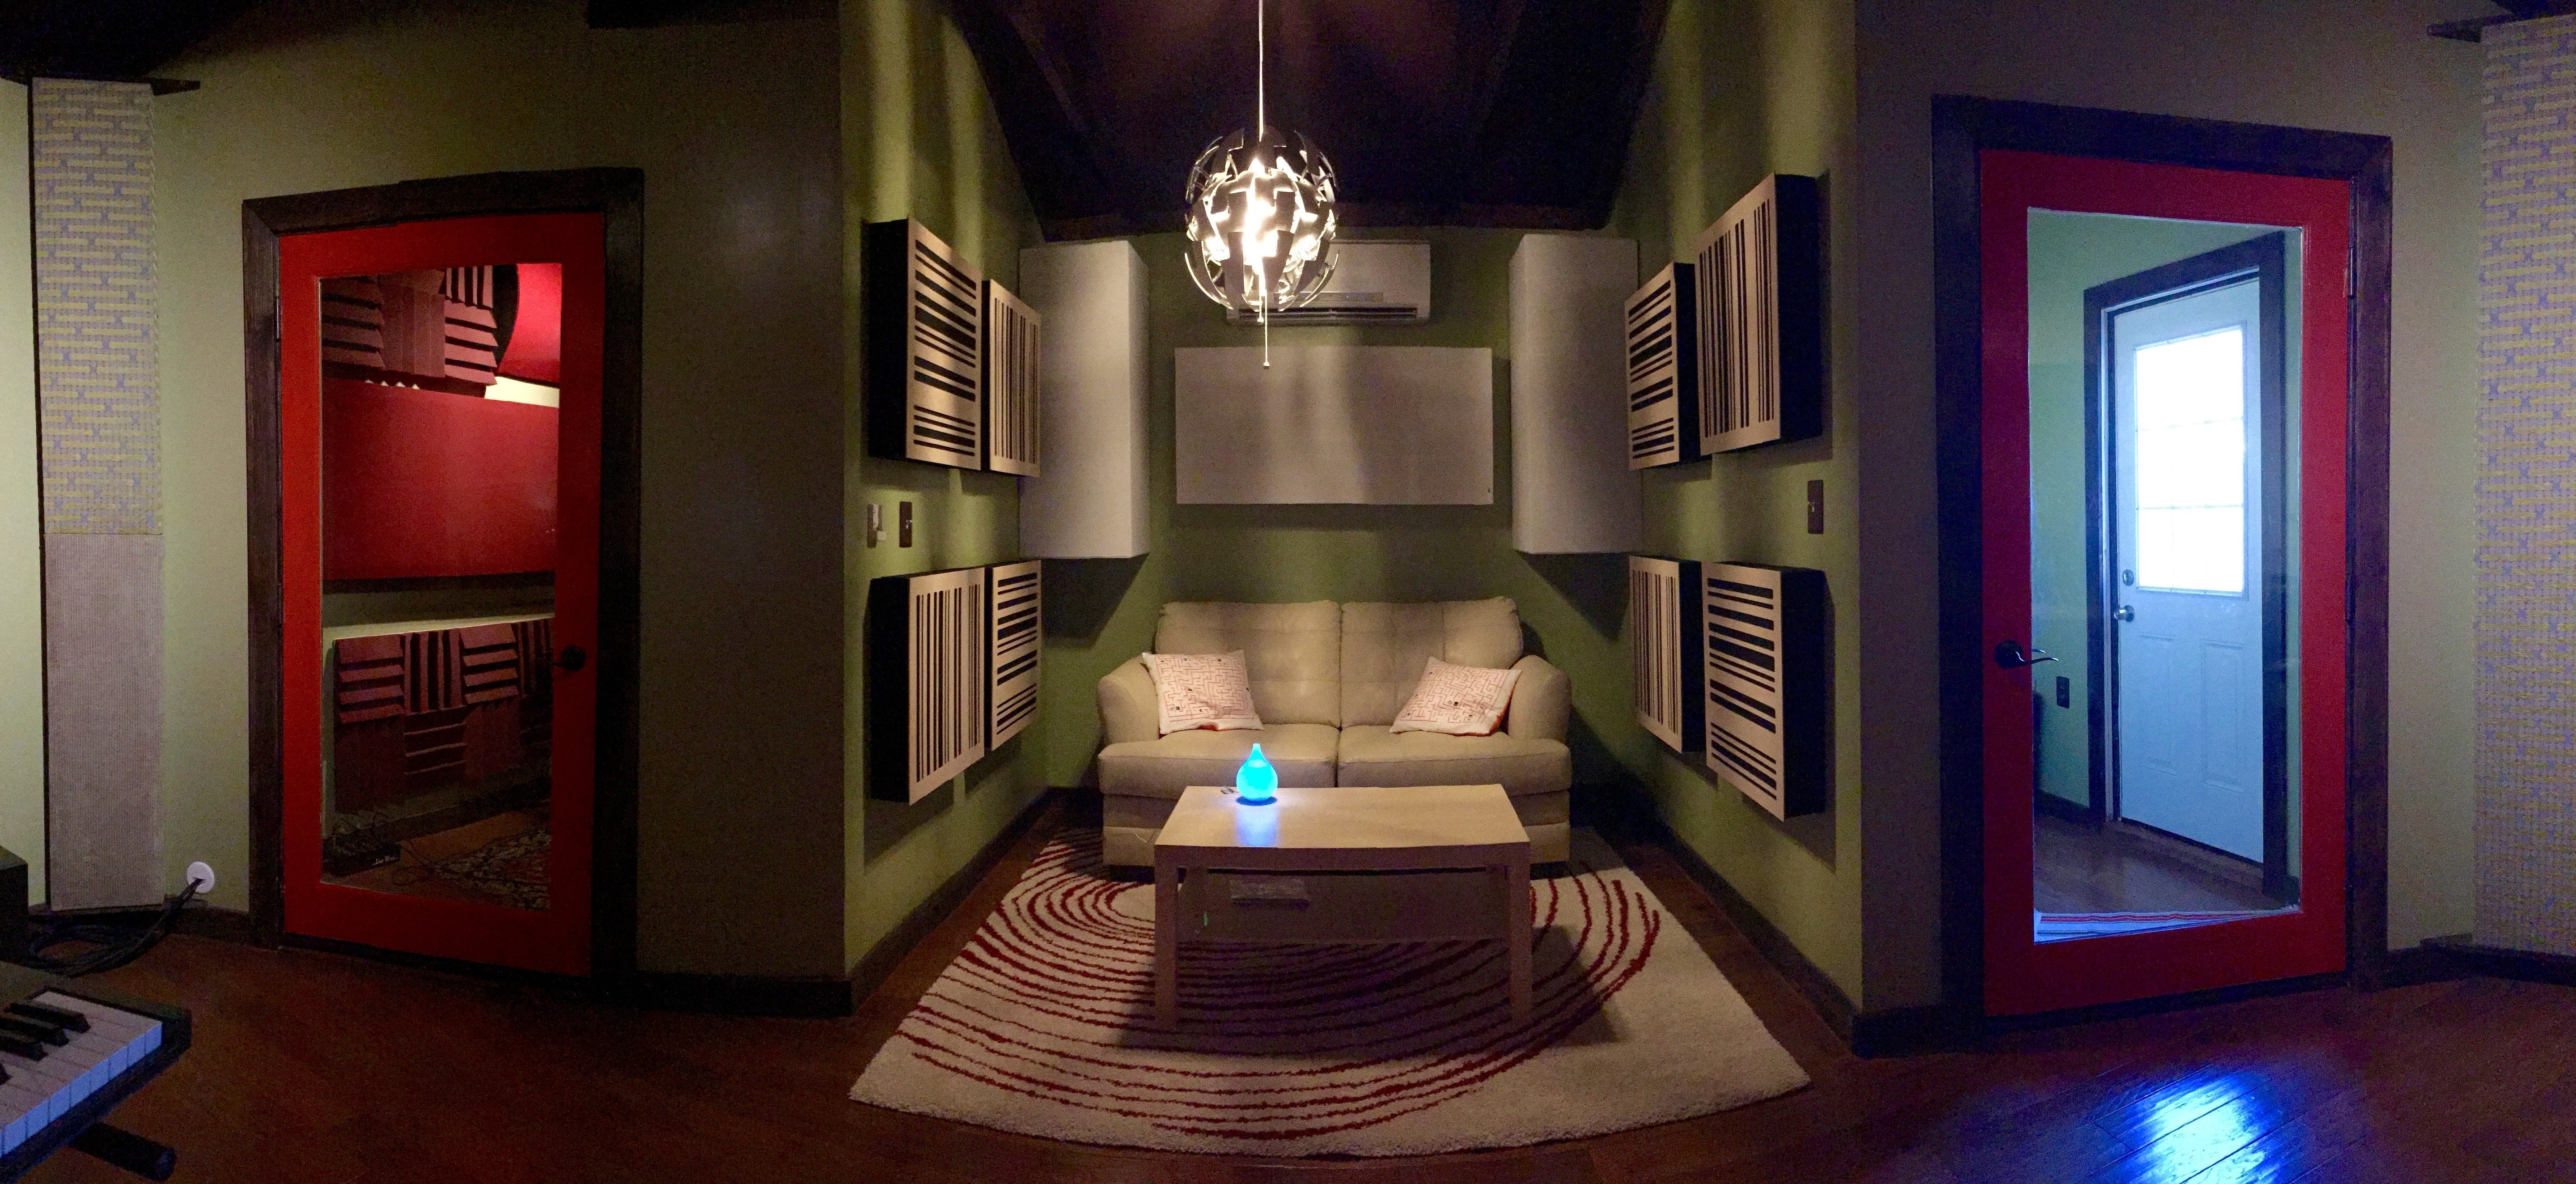
The first thing anyone setting up a recording space should do – especially if it's a small, household sized room – is find a primary "sweet spot" for recording. This is where most instruments being recorded will be set up, or where primary instruments will be if you are recording more than one performer. In today's music, the first question is usually whether or not you will be recording drums. Drums take up a lot of space, so in most cases they are the first consideration when it comes to placement. We can plan the entire room setup around the drums, and have them occupy the center of the main Sweet Spot. If space is tight and we need to make room for multiple performers, I will often arrange the kit so the drummer is sitting with their back to a corner facing out into the room, with the drums set up around the drum stool. Most of the time, I will employ this setup when tracking an entire band at once in the same room.
Let It Bleed?
Let It Bleed?
Recording multiple performers at once can improve the feel of the music, but requires a reasonably tight band to pull it off. Sometimes other instruments will be overdubbed later, so during the initial tracking session they can record direct using virtual amplifiers and headphones. This way the drums can be recorded with no bleed, yet it preserves the live feel and everyone can hear one another with headphones. Or, if the vibe of the band playing live is good and the band isn't interested in overdubs, you can use amps in the room set up to control the bleed. Note that we can't (and don't want to) eliminate the bleed entirely, but rather we want to be very aware of how the bleed sounds (treatment makes bleed sound better!) and to use the bleed to our advantage.
If the room is well treated, then there will be fewer reflections in the room and therefore also less bleed. Furthermore, in a good-sounding room, the bleed isn't nearly as offensive. You will probably find you need fewer spatial effects (reverb & delay) to achieve a wonderful sense of space and three-dimensionality in your mixes provided by the bleed. And by thinking carefully about placement and mic null points, we can influence which other instruments are bleeding into what mics. In rooms like this, recording a full band with good mic technique and portable panels placed strategically between instruments can produce an astonishing amount of isolation. And you can capture the bleed separately with room mics, to control exactly how much "room" ends up in the recording.
So let's review some of the general room treatment strategies. You may be familiar with these strategies as they also apply to listening rooms, but let's take a look at how they apply in recording spaces.
Bass Trapping
In this scenario of tracking a full band with a drummer in the room, bass trapping is a must. Certainly the kick drum must sound good, but all the drums generate low end – even the snare fundamental frequency is around 100Hz (maybe 150Hz, depending on the tuning). But this is also true for instruments we don't associate with the bass region. For instance, the low E string on an acoustic guitar is about 82Hz, so a good bass trapping strategy will certainly help a guitar recording as well. Often, problems in the upper bass region (100-400Hz or so) will be much more audible than problems in the lowest octaves, since most musical genres have much more energy there than in the lowest octave or two (under 80Hz).
Start with big, thick bass traps in the corner behind the drummer, floor-to-ceiling. This will help even out the low end, essential for good drum recordings with punch and impact. Soffit Corner Bass Trap and TriTrap™ Corner Bass Traps are great options here, as are Amplitude™ Bass Trap Panels.
Early Reflections

Next, in the sweet spot setup we will be getting very strong early reflections from the ceiling above the kit and from the side walls coming out from the corner. These reflections will be quite loud and quite early in time because the walls and ceiling are so close. In this case, treating the reflection points with absorption as thick as possible is the best strategy to completely get rid of those early reflections.
Keep in mind, early reflections are generally those that are sooner than 25-30ms from the original sound source, and these reflections won't ever do anything to help the fidelity of the recording (unless you are after a special effect or a specific lo-fi tonality). Once sounds in this time range – the early reflections – have been eliminated with thick absorption, we are left with only the original sound source, and then reverb & ambiance, which kick in after that 25-30ms threshold.
Balance & Ambiance

From there, further out into the room can be treated with additional panels to get the desired balance in the room. In most cases this will involve diffusion, often the Amplitude™ Acoustic Panels to get a wonderful blend of absorption at lower frequencies and diffusion at higher frequencies, or dedicated diffusors such as the Gotham Primitive Root Diffuser, Q7D Quadratic Residue Diffuser or GridFusor combined with absorptive panels. We will also employ additional bass trapping in the room corners, as well as pure diffusion from the 1D Q7D or the 2D Gotham diffusors, best employed on a large reflective wall furthest from the drums. For more on the difference between 1D and 2D diffusion patterns and how to apply them, see The Diffusion Dimension Download.
For the purposes of a recording room, we want the diffusors to work together to provide a nice diffuse sound field for reflections that are later in time than 25-30ms, which means walls that are 12-15 or more away from the sweet spot will benefit most from diffusion.
The Sweet Spot is for Drums, and Everything Else!
Creating a Sweet Spot for recording will help quite a bit, and is not unlike the Sweet Spot – or the listening position – in a control room or listening room. We are setting up the room around this spot. Creating a sweet spot in a recording room allows us to produce quality recordings of a wide variety of instruments, with specific desirable characteristics that sound good and provide a lot of mixing flexibility:
The close mics (and drum overheads if applicable) will be very focused and dry due to the absorption in close proximity, cleaning up the comb filtering and other artifacts from early reflections.
If the absorbers are thick, then the low end will be much more consistent, accurate and punchy, making it much easier to dial in compression and EQ to taste, rather than chasing peaky problem resonances or null suck-outs.
You can then set up room mics on the other side of the room, using a variety of techniques such as miking up a wall of diffusors opposite the drum kit. Then the room ambiance can be dialed in to taste, and no one else will be able to make recordings that sound exactly like yours. And yet, your sound will be consistent enough to comfortably reside within a variety of musical genres, depending on how it is mixed.
Recordings will have all the characteristics you want: a tight, focused sound with little or no early reflections under 25-30ms or so, and then a nice diffuse sound field that kicks in from there. There will be no resonant frequencies that need "repair" in mix or postproduction, and with skillful use of effects you can get any sort of sound you need for the song in question.
At this point, much of your room setup will be in place, and whether you are recording drums or another instrument, this Sweet Spot will likely be your primary recording zone. You'll do most of your overdubs here, and can also record ensembles or multiple instruments as needed.
Rest of Space

Unless you are blessed with a very large room, at this point the drums, acoustic treatments, and recording microphones will be dominating the space. If you will be recording a full band then using gobos such as the PIB™ Portable Vocal Screen or FreeStand Acoustic Panels placed between critical microphones and instruments you DON'T want that mic to pick up can help quite a bit. In addition, careful use of the null points in the microphones can also help, if you arrange things so that the nulls are pointed to other instruments that you don't want the microphone to "hear." This technique, combined with use of freestanding panels between instruments goes a long way. If there are nearby reflective surfaces that don't already have treatment, then using more absorbers can help here also.
Other Strategies
This "Sweet Spot" strategy for recording is pretty bulletproof and versatile, but if you have a project studio dedicated to specific tasks – such as a drummer or vocalist recording themselves – then these strategies can be adapted to your specific needs.
When In Doubt, Ask For Help
Talk to one of our acoustic experts — it's free.


Share:
The Diffusion Dimension Download: 1D vs 2D Diffusion
Speaker Placement 201: Part One